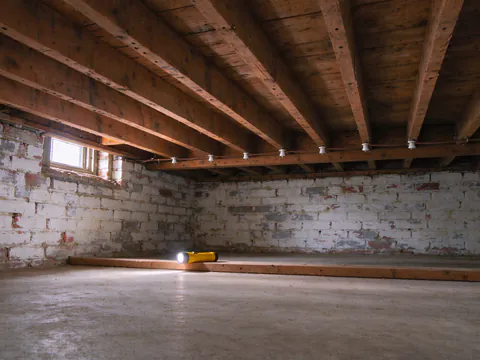
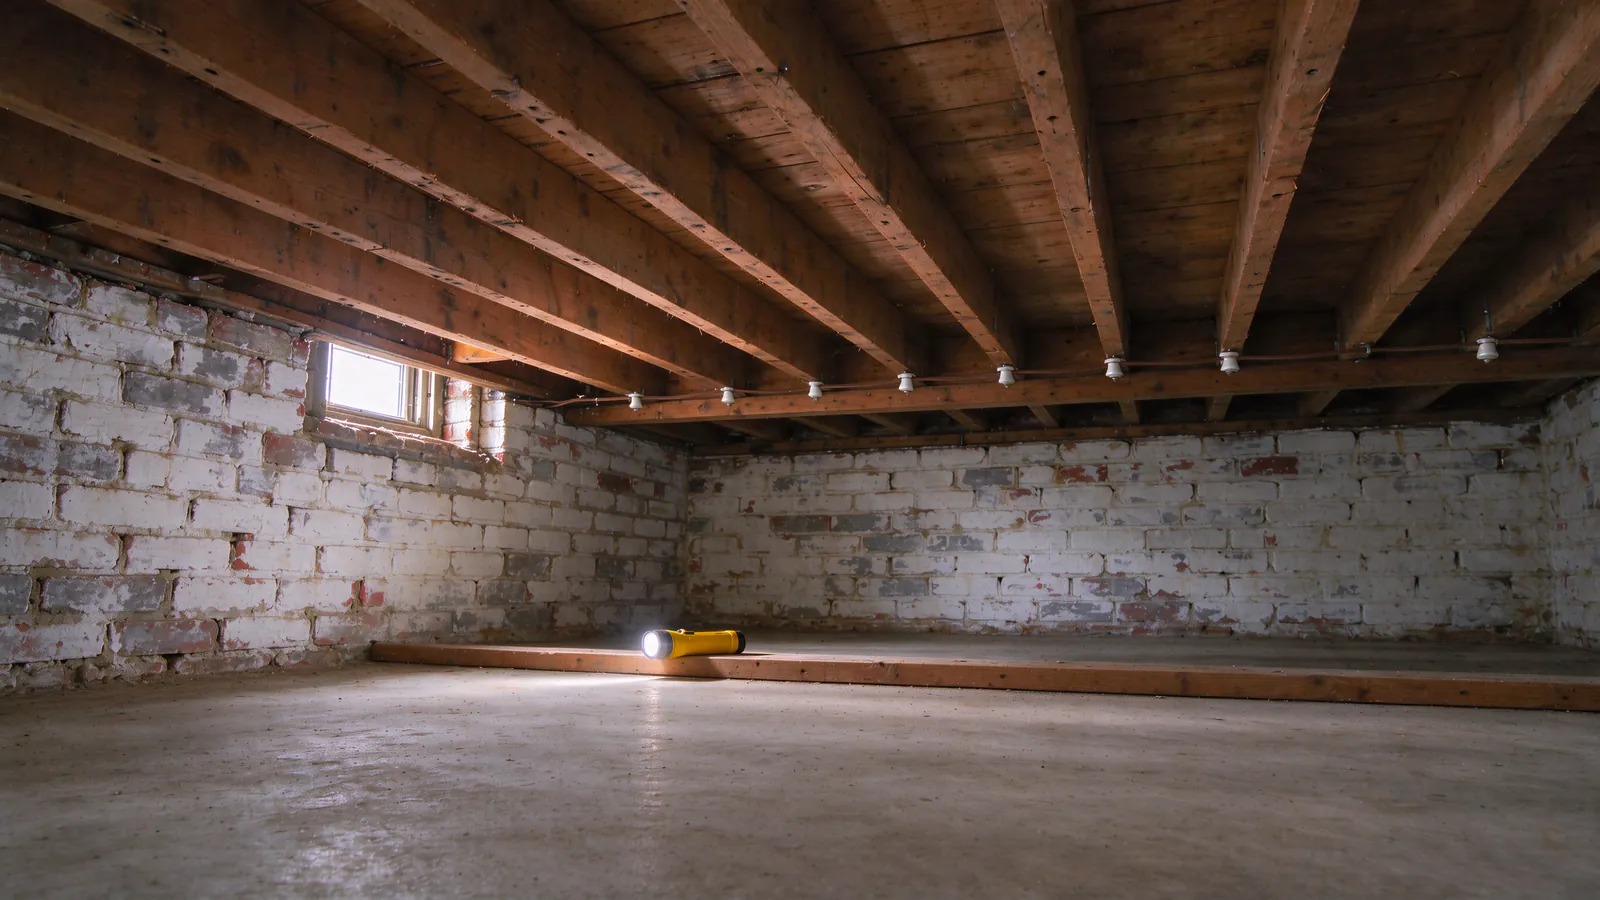
You identify knob-and-tube wiring by its separated layout: single cloth-covered conductors held off the framing by white porcelain knobs, passing through joists inside porcelain tubes, usually running a few inches apart instead of bundled in one cable. Basements and attics show it best, and you can spot it from a distance without touching anything. Philly Knob & Tube arranges knob-and-tube inspection and replacement in Philadelphia houses, with all electrical testing and rewiring done by licensed, insured electrical contractors, so this guide stops at what your eyes can tell you and explains where an electrician has to take over.
Recognizing Knobs, Tubes and Separate Conductors
The name describes the hardware. A knob is a small porcelain insulator, usually white or off-white, shaped like a spool or a two-piece button, fastened to a joist or stud with a nail or screw through its center. A single conductor wraps around or passes through its groove, so the wire is held an inch or so off the wood. A tube is a short porcelain sleeve, often with a flared collar on one end, set into a hole drilled through framing so the conductor never rubs against the wood where it crosses a joist.
The giveaway is that the two wires of a circuit travel separately. Modern cable keeps the hot, the neutral and a ground conductor together in one jacket. Knob-and-tube installers ran the hot on one line of knobs and the neutral on another, typically several inches apart, sometimes along different joists entirely. That separation was the safety design: open air around each conductor carried heat away, and distance kept the two from touching if insulation wore through. From a basement floor in a Philadelphia rowhouse with an open ceiling, a run often looks like two parallel lines of white dots marching down the length of the house.
Several other details support the identification:
- The conductor covering. Original conductors are copper wrapped in rubber, then a woven cotton braid soaked in a dark tar or varnish compound. Decades later it reads as a dull black, brown or grey cloth surface, sometimes fraying.
- Loom. Where conductors could not stay apart (entering a fixture box, crossing a pipe, dropping into a wall to a switch), installers slid them into flexible woven fabric tubing called loom. A black or tan fabric sleeve disappearing into a ceiling is a common sight.
- Original splices. Taps were made by twisting one wire around another, soldering the joint and wrapping it in rubber tape and then friction tape. These lumpy wrapped joints usually sit in open air near a knob, not inside a box. The splice and junction box guide explains why that mattered then and what changed later.
- Porcelain lampholders and old devices. Keyless porcelain sockets screwed directly to a joist or ceiling, pull-chain fixtures, push-button wall switches and two-slot receptacles all date from the same period. They often survive even where wiring around them has been replaced, so treat them as clues, not proof.
None of these features requires getting close. A flashlight beam from the bottom of the basement stairs or from the edge of an attic hatch usually shows them.
What Cloth-Covered Wiring Can Look Like
Many people searching for this topic have found old cloth-covered wire and assume it is knob-and-tube. Sometimes it is. Often it is a later material that used similar insulation in a different package.
The most frequent look-alike is early cloth-sheathed non-metallic cable, the predecessor of today’s plastic-jacketed cable. Two insulated conductors sit together inside one fabric outer jacket, and the cable is stapled flat to the framing with no knobs at all. It is younger than knob-and-tube and differs in construction and in what replacement involves, which the knob-and-tube vs cloth wiring comparison covers in detail.
The second is armored cable, often called BX: conductors inside a spiral metal sheath that looks like a flexible steel hose. Its inner wires may be cloth-covered too. A run of armored cable spliced onto a knob-and-tube circuit is common enough that the two get confused; the knob-and-tube vs BX guide separates them.
The third is low-voltage wiring. Old doorbell, annunciator and telephone wires were thin, sometimes cloth or paper covered, and occasionally ran on small insulators. They are much thinner than a household branch-circuit conductor and usually end at a bell transformer, a buzzer or a telephone block.
Finally, loom itself can fool you. Two conductors inside one fabric sleeve look like a single cable, but follow it a few feet and the conductors often split apart onto separate knobs.
Where It Shows Up in a Philadelphia House
Philadelphia has a deep stock of old houses: 39.9% of the city’s housing units, roughly 298,000 of 748,000, were built before 1940, according to U.S. Census Bureau survey estimates. That figure tells you the city has plenty of buildings from the knob-and-tube era. It does not tell you that any particular house still has it, because generations of renovation have removed, bypassed or abandoned original circuits.
Where it is still visible, the usual places are predictable. An unfinished basement ceiling shows runs heading to first-floor outlets and up interior walls. An attic or the low space under a rowhouse roof shows the lighting circuits that dropped into top-floor ceilings. Closets, the back of a stair, and the space above a dropped ceiling in a remodeled kitchen sometimes expose short sections. In a rowhouse, wiring often follows the long axis of the house between the party walls, because that is the direction the joists allow without drilling through them, so a single basement view can reveal more of the system than you might expect. That pattern is conditional; additions, rear kitchens and converted units break it.
What you will rarely see is the wiring inside plastered walls and between finished floors. Most of a knob-and-tube system lives there.
Visible Wiring Versus Hidden Circuits
Seeing knob-and-tube in the basement answers one question and opens three more. Is it connected to anything? Which rooms does it feed? How much more of it is behind the plaster?
The reverse problem is just as common. A homeowner sees only modern plastic-jacketed cable in the basement and concludes the old system is gone. But a renovation might have replaced the visible basement and first-floor runs while second-floor bedroom circuits still travel through the walls on knobs, entering a modern cable at a splice in the attic. Newer three-slot outlets on a wall say nothing about the wire behind them; the guide to three-prong outlets on ungrounded wiring explains why a grounded-looking receptacle can sit on a two-wire circuit.
The panel is the wrong place to look as well. A modern breaker panel can feed original branch circuits for decades, because replacing the panel does not replace the wiring that leaves it. When old and new wiring share a circuit, the guide to mixed knob-and-tube and modern wiring covers how those transitions happen and why they are hard to verify.
Why Photos Cannot Confirm a Safe System
A clear photo of knobs and tubes is useful. It tells an electrician what era of wiring to expect and where access might be easy. Bring it to the first conversation. What it cannot do is establish any of the facts that decide what happens next.
A photo cannot show whether a conductor is energized. A live run and a run that was cut at the panel thirty years ago look identical, and the difference between them is the subject of the active vs abandoned guide. A photo also cannot show insulation condition where it matters. The rubber under the cotton braid hardens and cracks with age and heat, and the worst sections tend to be the ones near light fixtures and under attic insulation, which a camera at the hatch does not reach.
Photos also miss the connections. Later splices made with tape or wire nuts, buried in a wall cavity or pushed into insulation, are a frequent failure point, and they are by definition the parts nobody can photograph. The same goes for overcurrent protection: a 15-amp-era conductor sitting on a 20- or 30-amp breaker or fuse looks the same in a photo of the joist.
Finally, a picture does not show what has been laid on top. Loose-fill or blown insulation over knob-and-tube in an attic changes how the conductors shed heat, and the 2020 National Electrical Code, which Philadelphia enforces, does not permit concealed knob-and-tube in spaces where insulation envelops the conductors. The knob-and-tube and insulation guide explains that conflict.
Next Steps for Identification
If you have spotted knobs, tubes or loom, stop using any circuit that shows warning signs that old wiring needs attention (a warm cover plate, a burning smell, scorch marks, a breaker or fuse that keeps opening) and call an electrician about it. Otherwise, there is no reason to touch anything. Write down where you saw the wiring, take photos from a safe position, and note any renovation history you know: which rooms were redone, whether the panel was replaced, and any insulation work in the attic.
The next step is a professional assessment. A licensed electrician turns off circuits one at a time at the panel, traces each to the rooms it serves, tests for voltage with proper meters, and looks at accessible splices, device boxes and insulation contact. The result should be a written circuit map that marks which runs are active knob-and-tube, which are abandoned, and which are modern, plus the areas that could not be reached. That is the work described on the knob-and-tube inspection page, and the knob-and-tube inspection checklist lists what that visit should cover so you can compare proposals.
If you are still getting oriented to how the system worked in the first place, start with what knob-and-tube wiring is, then browse the rest of the knob-and-tube guide library. When you are ready to have a house looked at, request an estimate and include your photos and anything you know about past electrical work.